How to Apply Lip Color Perfectly

Is there any better mood-booster than a pretty pop of lip color? It’s the answer to just about anything. Got the cloudy-day blues? Swipe on a red lipstick to brighten things up. Don’t feel like putting on a full face of makeup? Add a touch of pink gloss to look (and feel) put together in seconds.

Although we can fully attest to the life-changing power of a lipstick, we also know we could all use a little help with tricky areas, like finding the right shades for our skin tones, making our lip looks last all day, and applying color to enhance our lip shapes and to create the most natural – or precisely bold – effect. For all the answers to our important lip color questions, we tapped makeup artist Lauren Lancaster who makes it her mission to help women discover easy-to-achieve looks that make them feel confident, beautiful and empowered. Here are her tips and tricks for creating lip looks you’ll love.

The White Tea & Citrus Satin Lips® Set is photographed in an African-American model’s pink-manicured hand in front of a two-toned pink background.

Tip #1: It’s All About the Prep.

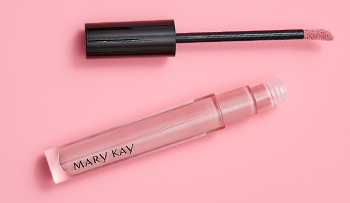
The secret to smooth, seamless lip color is starting with properly prepped lips. In other words, moisturize, soften and polish

First, gently exfoliate your lips to slough off any dead skin, then follow with a hydrating, softening lip balm. You might be thinking, “Is this really necessary?” Trust us, you don’t want color looking cakey and clumping to your dry lips. (How’s that for a powerful visual?)

Something to note: If you regularly find your lips feeling dry and chapped, that could be a sign of dehydration, so make sure you’re drinking enough water, especially if you’re a coffee or tea drinker.

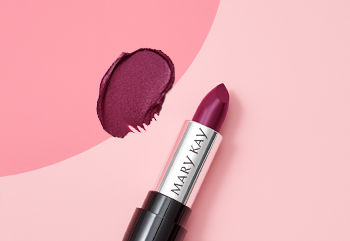
Once your lips are fully scrubbed and smoothed, you’re ready for color. If you’re applying lipstick right away, blot your lips with a tissue or blotter to remove any excess balm.   
A red Mary Kay® lipstick is photographed with its cap off lying atop a pink background alongside a smear of lip color.

Tip #2: Rock a Bold Lip Look.

Nothing says you mean business like a bold, red lip. For the most precise, long-lasting look, start by outlining and filling your lips with a lip liner that matches your lipstick. This will give you definition and an added layer of color to help avoid the dreaded lip ring that appears after a day of eating, drinking and chatting.

Start at your Cupid’s bow and work your way around your top lip, then line your bottom lip starting at the center and working your way out. And don’t feel pressure to “overdraw” your lips to make them look fuller. You can (and should!) feel confident enhancing your natural lip shape.

Next, apply your lipstick. If you prefer a matte look, choose a highly pigmented formula with comforting ingredients that will keep your lips from drying out. Apply straight from the tube, beginning at your Cupid’s bow and working your way around.

Ivory Skin Tones: If your skin is fair, look for complementary blue-based reds.
Beige to Bronze Skin Tones: If your skin tone is medium beige or bronze, choose a classic red or a warmer red with hints of orange.
Deep Bronze Skin Tones: If your skin tone is deep, brick reds and burgundy shades can look stunning.

If you prefer a softer finish, dab your lips with your fingertips or a brush to smudge the color a bit. This will give a pretty, stain-like look.
An open tube of Mary Kay® Perfecting Concealer is photographed alongside its doe-foot applicator and a product smear in front of a two-toned pink background.

Tip #3: Make Your Lip Look Sharp and Long-Wearing.

For extra precision and to keep your lipstick color in place, grab a skin tone-matching concealer, and apply it around your lip line. This will really sharpen your look and can help prevent any possible feathering.

To give your look some staying power, start by pulling apart a tissue so it’s one ply. Hold it over your lips and brush translucent powder on top. This easy extra step seals in the color.
A Mary Kay® lip liner in a nude shade is photographed with its cap off atop a two-toned pink background and alongside a product smear.

Tip #4: Find Your Best Nude Shade.

If you’d rather make a more subtle statement, reach for a nude shade. The key to achieving the perfect nude lip is, again, making sure your lips are hydrated – these shades can throw a spotlight on dry lips, creating a chalky effect – and finding the best shade for your complexion.

Ivory Skin Tones: Nude shades with a touch of pink wear especially well on fair skin. 
Beige to Bronze Skin Tones: If your skin tone is medium to bronze, try caramels.
Deep Bronze Skin Tones: Rich cocoas are flattering. 

Just like a bold lip look, you’ll want to start with a lipstick-matching lip liner since it really anchors the color. With nudes, a formula with a little luminosity is a great way to keep the color looking fresh and helps keep your lips moisturized.  
A berry-colored Mary Kay® lipstick is photographed with its cap off next to a product smear on a two-toned pink background.

Tip #5: When in Doubt, Choose a Universally Flattering Shade.

If you want to take the guesswork out of finding the best shade for your skin tone or if you’re buying lipstick for a friend or family member (oh, hi, bridal party!), go for a rich berry hue. These delish shades work on just about everyone and come with an added bonus: Their blue base can make your teeth look whiter. Score!

You can pair it with a berry lip liner, or if you’re working with a bold shade and want to take it down a notch, a nude lip liner is a great alternative. This will soften the color a bit while still delivering the added staying power and definition you crave.
An open tube of shimmery pink Mary Kay® lip gloss is photographed alongside its doe foot applicator and a product smear.

Tip #6: Make Your Lip Gloss Work Overtime.

Hey, gloss girls, we see you! And we get you – a pretty, nonsticky gloss makes lips look lush and is more forgiving than lipstick so you have more flexibility with shades and techniques. And you can apply without a mirror. (Insert hair toss.)

Aside from looking lustrous on its own, gloss is also a great partner for lipstick when you want to add a little dimension. Simply add a bit to the center of your lips and press them together for a perky pout, or swipe all over to give your lip color some added shine.